There is little argument that handstand walking is one of the most impressive functional fitness moves to master. Not only does it require considerable strength, balance, and control, but it also certainly is one unique skill to have (and a potential party trick). The key is practice and patience. Regardless of how strong or conditioned you are, no one masters the handstand walk on the first go. Here is our step-by-step guide featuring tips and progressions to achieve handstand walks.
6 Tips for Handstand Walks
1. Back to Basics: Kicking Up
You know what they say — you have to walk before you run or, in this case, kick up before you can walk. Using the wall allows you to find your perfect hand and body position along with building shoulder strength. It’s also great for building confidence. Kicking upside down is a scary goal for some people.
Start by getting into a lunge. Then, place your hands about a foot away from the wall on the ground shoulder-width apart, palms slightly turned out, and index fingers pointing forward. Drive your back leg toward the wall as you propel your feet toward the wall.
Once in a handstand position, ensure that you maintain a tight, hollow hold, shrugging your shoulders toward your ears, keeping your feet together, and actively pushing into the ground. Practice kicking up several times to build confidence. Hold in the position, building to at least 60 seconds.
Note: If you don’t already have handstand kick-ups, begin with wall walks. Here’s a demonstration. (You can move much slower, if needed. These can be challenging but are great for building upper body strength.)
2. Next Level: Shoulder Taps
One of the most challenging parts of handstand walking is that your weight is constantly shifting from one arm to the other. Shoulder taps allow you to practice shifting your weight in a controlled manner against the wall.
Kick up to the wall or wall walk in. Some people prefer to face the wall. You can face either direction.
Once in your perfect, hollow, and tight handstand position, shift your weight to one side and try to lift the opposite hand off the ground slightly. For example, lean toward your left and try to lift your right hand off the ground. You don’t need to tap your shoulder just yet. Just let it hover above the ground for a moment.
As you get more used to shifting your weight, lift your hands higher and higher until you tap your shoulder. To make it harder, progress to tapping the opposite shoulder. If you want to take it one step further, you can tap the side of your body.
Start with as many as you can, building up to sets of 20 unbroken.
3. Take It Up a Notch: Build Confidence
Now it’s time to get a little practice away from the wall, but still nearby.
Kick up just a few feet from the wall and let your heels slightly drift ahead of you. This is what helps you begin to move forward.
Walk toward the wall and use it for support by allowing yourself to “fall into” it after you take a few steps on your hands. This is yet another opportunity to build strength and confidence. You can also work on your free handstand hold by pausing in your handstand for a moment before you start to walk. (More on free handstands in a minute.)
To make this exercise more challenging, try this: wall walk in and attempt to walk away from the wall by allowing your body to tip past 90 degrees. As you feel yourself tipping forward, follow by walking with your hands.
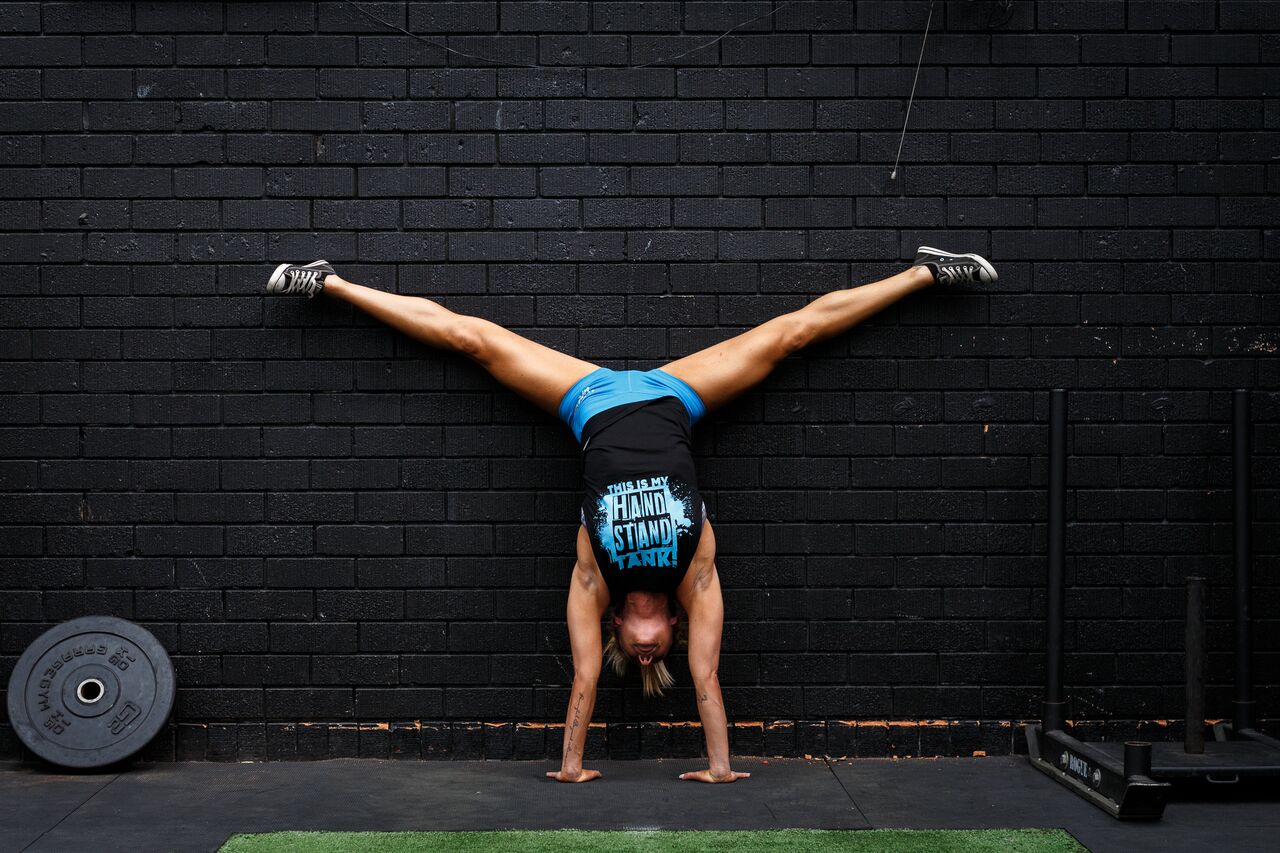
4. Move Away: Free Hold
Take it away from the wall to build your vertical balance, shoulder strength, and core. Try kicking up into a handstand hold in a free space. Ensure that you:
- Maintain an engaged, hollow position.
- Look down — not ahead of you!
- Keep your feet together and pointed.
Your glutes and core should be engaged as in a hollow position. See how long you can hold — start with small increments, building up to 30 seconds or more. If you are uncomfortable doing these, grab a partner to spot you.
Athletes tend to let their ribs pop out and their backs arched. This makes holding a handstand more challenging and can actually be dangerous for your musculature. Camille Leblanc-Bazinet has some good advice on this.
5. Prepare to Move: Assisted Walks
Grab a partner and a PVC pipe. Your partner holds the PVC pipe in a wide grip at chest height with arms outstretched. When your partner is in position, kick up into a handstand into the PVC pipe. Take the time to straighten and get your hands into the correct position.
From here, your partner will begin to step backward and, simultaneously, you will walk your hands forward using the support of the PVC pipe. Remember, your heels will be slightly in front of you to help propel you forward. It’s natural for it to feel like you’re falling, because really, you are. It’s just that you stop yourself from falling by essentially “chasing” your feet — walking on your hands!
Once you feel your form break, kick back down.
Continue until you can do several steps. Why not set some cones up and see how many metres you can get?
6. Practice Makes Perfect
Now that you’ve done a number of progressions, it’s time to put the principles into practice. To recap, the key things to remember are:
- Maintaining an engaged core.
- Keeping active shoulders.
- Looking down.
When practicing your walk, ensure that you practice how to fall without a wall. This comes down to personal preference, but typically, falling back to where you came from or to the side like a cartwheel is best and safest. If you’re going to let your feet fall forward in front of you, your best bet is to learn how to tuck and roll.
To practice the tuck and roll, start by getting comfortable with somersaults first.
Final note: It has been said, but practice really does make perfect, and this is one skill that needs investment, so practice, practice, practice.
Follow these tips and you’ll be walking on your hands in no time.
Gear up for the Open with The WOD Life. Shop today!